
Connecting a source in the console: the discovery token, the deploy token, and the attach safety harness
This page is the task guide for protecting a Cloudflare source from the console, end to end, without ever opening a terminal. It is written for a self-hoster running their own engine. You browse your account with one token and attach the chosen resource with a different token. The engine adds the binding to itself behind a safety harness that refuses to touch any of its own wiring.
The one rule to hold onto throughout: there are two tokens, they do different jobs, and they are not interchangeable. Everything else follows from that.
The two tokens
The console uses one token to read your account and a separate token to change the engine’s bindings. Mixing them up is the most common confusion, so they are kept distinct in the interface and in what the engine accepts.
| Token | Scope | Job | Lifetime |
|---|---|---|---|
| Discovery token | Read-only (“Read all resources” template) | Lists what your account holds so you can pick a source to back up | Verified live, then stored in the engine’s Durable Object; never shown again; removable after a confirm prompt |
| Deploy token | Edit Cloudflare Workers template | Lets the engine add or remove one of its own bindings | Sent once over the authenticated channel, used once, never stored, and you revoke it straight after |
The discovery token is read-only on purpose: it can never write or change anything in your account. The engine uses it only to enumerate your resources and read their configuration. Your KV, R2 and D1 record values are read through the in-account bindings, never through this token. When you save it, the engine verifies it live against the Cloudflare API first, so a typo or a scope-less token is refused with Cloudflare’s own status rather than stored. After that it lives in the engine’s Durable Object, and the audit trail records who set it and when, never the value.
The deploy token is necessarily broad, because Cloudflare checks an Edit Cloudflare Workers token against every binding type the engine uses. That is why it is one-shot: you paste it, the engine performs exactly one read-modify-write, and you revoke it the moment the change lands. The running engine holds no Cloudflare deploy token of its own; it reaches your data only through bindings.
No terminal, either way
Both tokens are used inside the console. The engine performs the privileged binding change itself with the token you paste; you never run wrangler or any other CLI. A collapsed “prefer no token” path that uses your own wrangler login is available as a fallback for an operator who wants it, but it is never the recommended route.
The three Sources tiers
The Sources screen answers one question: what in your account is protected, and what is not yet. It does that in three tiers.
| Tier | What it holds | What you can do |
|---|---|---|
| Protected | Bound to the engine and covered by a downpipe (Secrets Store bindings included) | Manage it from Downpipes |
| Attached, not yet protected | Bound to the engine, but no downpipe yet | Bulk-protect: tick several, share a schedule, pick the destination fan-out, create the downpipes in one step. Ticked Secrets Store secrets bundle into one Secrets downpipe; every other ticked source becomes its own downpipe |
| Across your accounts | Everything the read-only discovery token can see | Attach what is in the engine’s own account; other accounts list read-only |
The third tier has one limit. The discovery token can list resources across every account it can see, but only the engine’s own account offers the attach flow. A Worker binding cannot cross accounts, so a resource in another account is visible for awareness but cannot be bound to this engine.
Behind that tier is a Choose accounts control, which reads Account settings while your token can see only one account. It has two parts: a set of tick boxes that pick which of the accounts your token can see the console actually browses, and a single Engine’s account radio that marks which one the engine itself runs in. The radio matters because that is the only account whose resources you can attach; every other ticked account is listed read-only for awareness. Tick the accounts in the discovery list and mark the engine’s account so the attach flow knows where to bind.
The happy path
The quickest route is the guided picker on the Sources screen, which lists what your discovery token sees and attaches your pick in one step. The walkthrough below is that path.
Connect your account
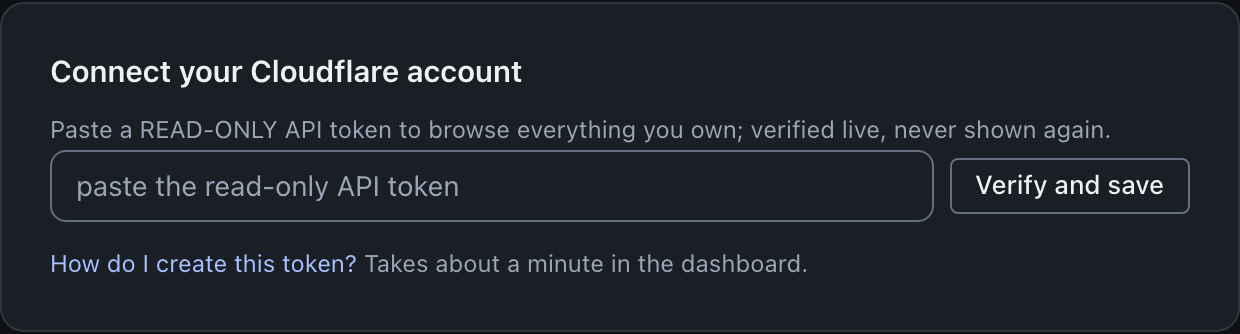
On a fresh deployment, the Sources screen is the connect form. Paste your read-only discovery token and save it. The engine verifies it live, reports how many accounts it can see, and from then on the screen lists what you own. An Owner sets this token; the engine enforces that. Setting the token is also opt-in dual-control gated, the same as Attach: on a fresh deployment this control is off, so saving the token verifies and stores it immediately. If an Owner has armed the second-owner-approval gate, saving instead queues a pending approval and the console says so rather than claiming the token is verified; a second Owner approves it before the token is actually stored. Clearing the token is never gated, since that only removes a credential.
Pick what to back up
Open “Add a source”, choose a resource type (KV namespaces, R2 buckets, D1 databases or Secrets Store secrets), and tick the resources you want from the catalogue. Only resources that are not already attached are shown. You can tick several at once, including every secret in your Secrets Store: each ticked secret mounts as its own read-only binding, which is the only way a Worker can read a Secrets Store value. A friendly binding name is derived for each pick (for example
SRC_KV_uploadsorSRC_SEC_api_key), so you do not name bindings by hand on this path.Attach with a one-shot deploy token
Paste a short-lived Edit Cloudflare Workers token and press Attach. The engine adds the bindings to itself, proves none of its own are dropped, writes the change, and re-reads to confirm. Attaching is Owner-only, because it changes the engine’s bindings; an operator who is not an Owner can configure a downpipe but sees the Attach control disabled. Attach is also opt-in dual-control gated: on a fresh deployment this control is off, so Attach runs immediately as described. If an Owner has armed the second-owner-approval gate, the first submission (before the token is even checked) instead queues a pending approval and returns without attaching anything; a second Owner approves it, and only the resubmitted call with the token completes the attach. See change control for how the gate is armed and approved.
Revoke the token and confirm the binding is live
Revoke the deploy token on the same Cloudflare API Tokens page. On this guided path the engine has already confirmed the bindings survived before the Attach button reported success, so the wizard closes and the screen refreshes immediately: the newly attached sources appear under “Attached, not yet protected” straight away, with no wait. The separate catalogue panel under “Across your accounts”, and its no-token wrangler fallback, instead run a bounded poll that re-checks the bound list every few seconds until the bindings appear, since a manual
wrangler deploycompletes on its own schedule.Configure a downpipe
Once the bindings are live, protect them: either tick them under “Attached, not yet protected” and press Protect selected, which counts up to “Protect 3 sources” as you tick (a shared schedule and destination fan-out for the whole selection), or open the create wizard, which offers the same multi-select. Either way, each ticked store becomes its own downpipe, ticked secrets bundle into one Secrets downpipe, and every downpipe in the batch writes to the destinations you ticked (the first is the primary, the rest are replicas). Each source moves from “Attached, not yet protected” into “Protected” once a downpipe covers it.
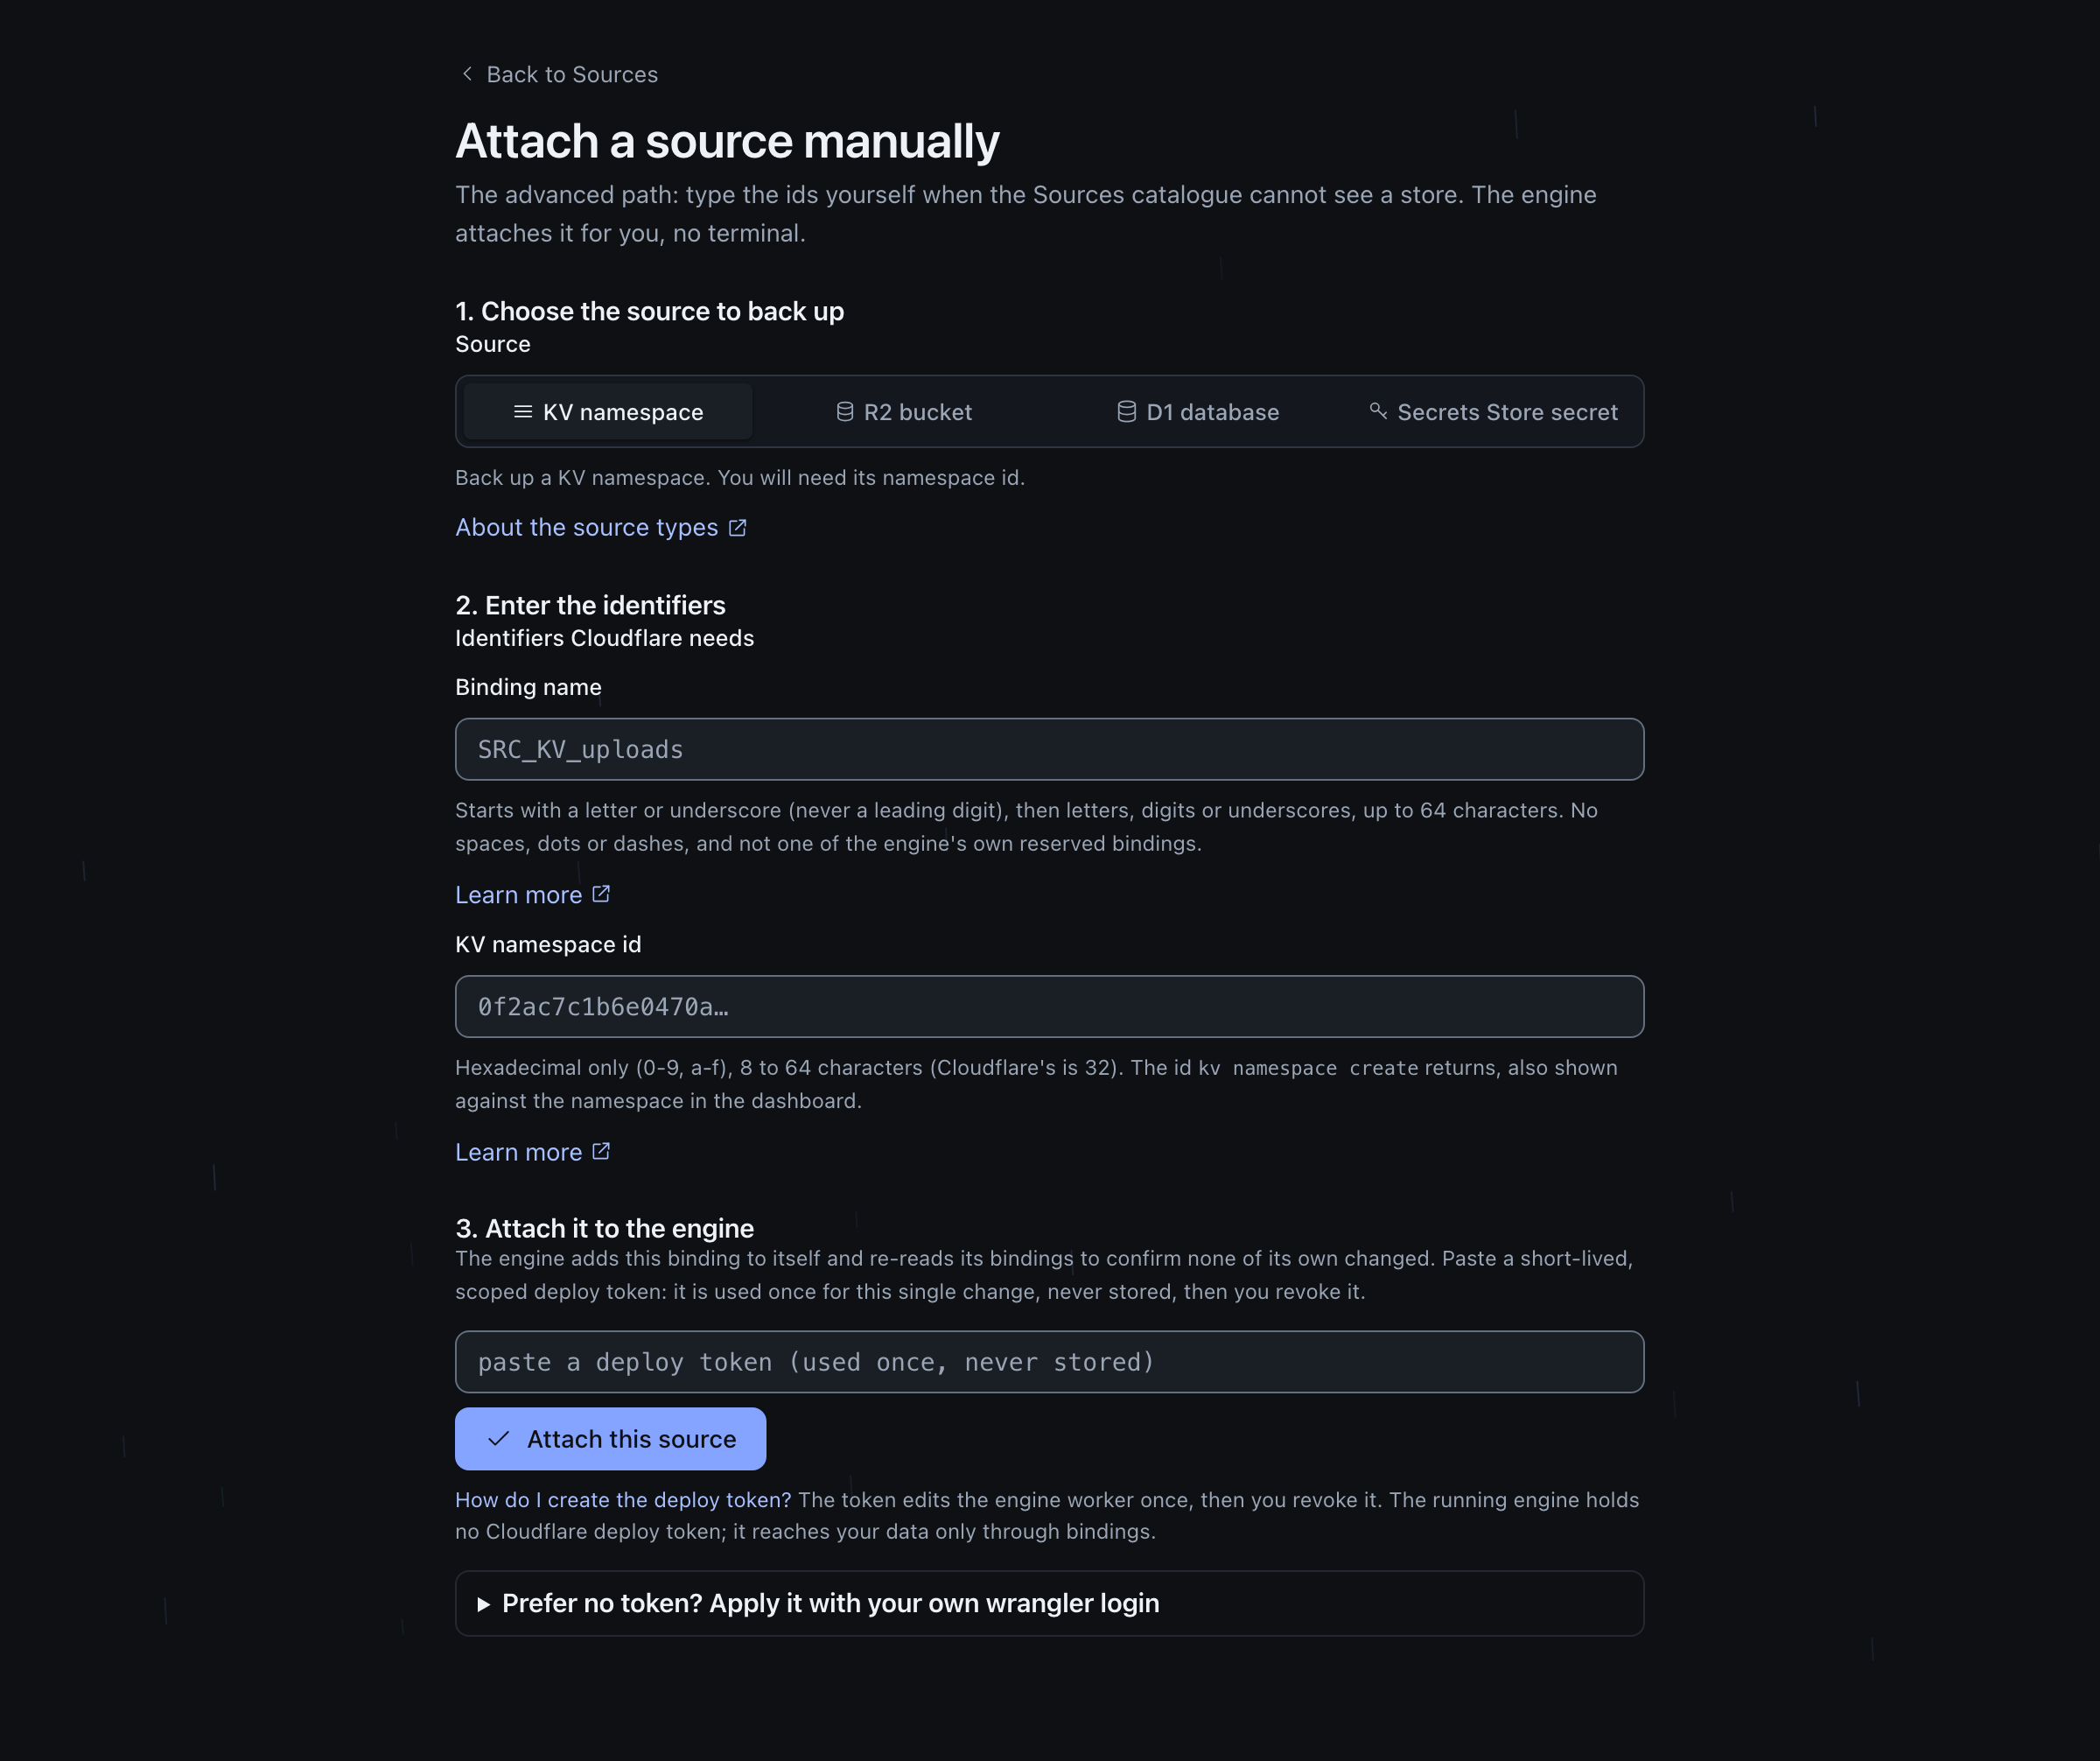
When the catalogue cannot enumerate a store, the manual “add by id” screen lets you type the identifiers yourself and attach through the same safety harness. It is the companion to the picker, not a different mechanism.
The attach safety harness
The one hard constraint on attach and detach is that the engine must never drop or alter one of its own bindings, because that would brick the running engine. So the whole operation is a safety harness: it proves safety before writing, verifies it stayed safe after, and refuses to the wrangler path on any doubt. These are the steps the engine runs on every attach or detach.
Read the real bindings
The engine reads its current bindings from the same Cloudflare script-settings endpoint the write uses, so the read needs no permission the write does not and the two shapes match. An unexpected shape is refused.
Prove it is this engine
The read must contain the engine’s required Durable Object bindings. A read missing them is not this engine, or is a bad read, so the engine refuses rather than risk modifying a stranger or acting on stale data.
Validate and compute the new set
Each addition is checked as a valid, non-reserved binding whose name does not collide with an existing one. The new set is every existing non-redacted binding re-sent verbatim, plus the additions; the engine’s own
secret_text/secret_keybindings are preserved viakeep_bindingsinstead, since Cloudflare never returns their values on read.Prove the superset, then write
The engine proves the computed set strictly contains every existing binding by name and type, with the additions as the only difference, and refuses if any existing binding would be lost or changed. Only then does it write. Script-settings updates are atomic, so a failed write applies nothing.
Re-read to verify
The engine re-reads its bindings and confirms every original binding is still present and every new binding landed. A mismatch throws a loud, named error pointing at the wrangler recovery path, never a silent gap.
This is also why a detach is safe: the Sources screen only lists unprotected sources for detach, so nothing depends on what you remove, and the same superset proof guarantees the engine removes only the named bindings and keeps all of its own.
Binding names and the Secrets Store
A source binding name is validated in the console before anything is generated or sent. The rule is a valid JavaScript and wrangler identifier: a leading letter or underscore, then letters, digits or underscores, up to 64 characters. This is deliberately a subset of what the engine accepts, so the console never emits a name the engine would reject. The name is also checked against a reserved-bindings set that mirrors the engine’s own list byte for byte, so a source can never be named after one of the engine’s internal bindings (its scheduler, its archive, its signer key, its destination credentials). The reserved check is the reason a source binding could never seal the signer key or the destination credentials into a backup.
A Secrets Store source is a first-class type in the guided picker (the store id and secret name come from discovery), and the manual by-id screen covers stores the catalogue cannot enumerate. Either way it is referenced by its store id, the secret name and the chosen binding only. The secret name follows its own rule: a leading letter or digit, then letters, digits, hyphens or underscores, up to 64 characters. There is deliberately no value field anywhere in the flow. The secret value lives in Cloudflare’s Secrets Store and is read at runtime through an async binding get; it is never entered in the console, never put on the wire, and never rendered. The form hint says this in place, so the no-custody promise is visible at the point of entry.
Presence is not proof a key works
Attaching a source records that a binding or a secret is set. It does not prove the value parses, decrypts, or verifies. From the console, the coverage inventory effectively always reads unknown: it shows what is attached and what is covered by a downpipe, never a green tick claiming an attached source has been proven recoverable. Proving recoverability is a separate step, and the console never paints unknown as known.
Finding the ids for a manual attach
Most sources arrive through the guided picker, which reads the id and name from discovery so you never type them. The manual by-id screen is for a resource the catalogue cannot enumerate, and there you enter the identifiers yourself. The console validates each one before it sends anything, so a value the console accepts is one the engine will take.
| Field | Format | Where to find it |
|---|---|---|
| KV namespace id | 8 to 64 hexadecimal characters (0 to 9, a to f). A real namespace id is 32 hex. | The dashboard under Storage and Databases, KV, or wrangler kv namespace list. |
| R2 bucket name | A leading letter or digit, then letters, digits, hyphens or underscores, up to 64 characters. | The R2 area of the dashboard, or wrangler r2 bucket list. |
| D1 database id | A UUID, or 8 to 64 hexadecimal characters. | The D1 area of the dashboard, or wrangler d1 list (the id column). |
| D1 database name | A leading letter or digit, then letters, digits, hyphens or underscores, up to 64 characters. | The name you gave the database; it appears beside the id in the same list. |
| Secrets Store id | 8 to 64 hexadecimal characters. | The Secrets Store area of the dashboard. The secret value is never entered here (see above). |
The id identifies the resource; the binding name is the label your Worker code and the engine use to reach it, and it follows the identifier rules in the section above. A wrong id is caught when the attach is verified, not after a run has silently captured nothing.
The audit trail
The engine records each attach and detach in the audit trail, keyed to who performed it, never to a token or secret value. If the audit write still fails after the engine’s retries, the change stands and the engine counts the lost entry as a dropped write. From engine 0.3.6, the entry also names the bindings that the attach added or the detach removed. The console makes each binding name from the resource name, so the entry can show a bucket, namespace, database or secret name in a changed form: letters and digits stay, and other characters become underscores.
The trail is redaction-safe for your customer data: it carries no record values, no keys and no secrets. It does carry operator identity, including emails and source IP addresses, because that is what makes it an accountability record. The audit log is tamper-evident, and it contains personal data. Setting the discovery token, attaching a source and detaching a source are each first-class audited events.
Create the discovery token under My Profile
Cloudflare issues user tokens, created from My Profile, then API Tokens, and account tokens, created from the account’s own API Tokens page under Manage Account. Both offer the “Read all resources” template, so the two look the same at creation time. Create the discovery token under My Profile, because Cloudflare refuses two cf-config surfaces to an account token by its kind whatever permissions it carries: page rules answers error 1011, “Page Rules endpoint does not support account owned tokens”, and zone device-policy certificates answers error 1039, “malformed actor email claim”. Cloudflare still offers the page rules permissions to an account token, so ticking them looks accepted and captures nothing; the refusal appears only when a backup reads the surface. To check an existing token, open My Profile, then API Tokens: a user token is listed there and an account token is not. Those two surfaces are the only ones the kind decides; everything else turns on the permissions you grant.
Start from the “Read all resources” template either way, but do not stop there if your account uses Access, Gateway, Logpush, account-level load balancer pools, DNS Firewall or Hyperdrive: the template does not reliably carry those permission groups, and a surface it cannot reach reads as unavailable regardless of your Cloudflare plan. The exact groups to add, and how to confirm the token reaches everything your account uses. The KV, R2, D1 and Secrets Store values are read through bindings rather than through this token, so none of this affects them. From engine 0.3.6, a Secrets downpipe uses this token only to record each secret’s scopes, comment and Worker wiring. Without a token that can read the Secrets Store and the Worker scripts, the archive records that wiring as unknown.
Where this fits
- Backing up and restoring your Cloudflare configuration has the two surfaces in full, with what each one answers and what it costs.
- Sources overview sets out what each of the eight source types captures and how each restores.
- Snapshot consistency explains what a KV or R2 crawl actually represents.
- Cloudflare token scopes is the deploy token in full: every permission it carries, why it is one-shot, and the separate edit-scoped token a configuration restore needs. The two templates themselves are in the table at the top of this page.
- Deploy safety and bindings explains how a later manual deploy preserves console-attached bindings.
- Roles and capabilities explains why setting the token and attaching are Owner-gated.
- Change control covers the opt-in second-owner approval that can queue an Attach or Detach before it runs.
- The audit log covers what the tamper-evident trail records, including operator identity.
Last updated .